
This one's really cool!
So, what problem am I solving here? Well, among a raft of things to take care of in a post-production pipeline is being able to build some basic set pieces. Not just for knowing where to put things, but also to achieve other problem solving steps - such as making shadow catchers. I've thought about this for a while now. And I wasn't really sure about taking it on. But while I'm still waiting for my motion capture gear to arrive, I thought I'd have a go at making a tool to help with this.
I wasn't intending on building a complete tool, it was meant to be a prototype idea more than anything else. Something with basic functionality and controls, so you can see what it is. It didn't even have to have an engine. It really was only meant to be a concept tool.
Discounting the engine itself (I'll come back to this), I went ahead and started building the tool and an interface for it. The idea needs an object, an interface, and a window dialog for the user to complete some operations in. And of course, eventually, it needs an engine to work its magic.
I started designing the object interface, and realised I could just borrow the code from another tool I made to start it. With some alterations and additions, I ended up with an interface that's not too dissimilar to my track set projection tool. It looks like this:
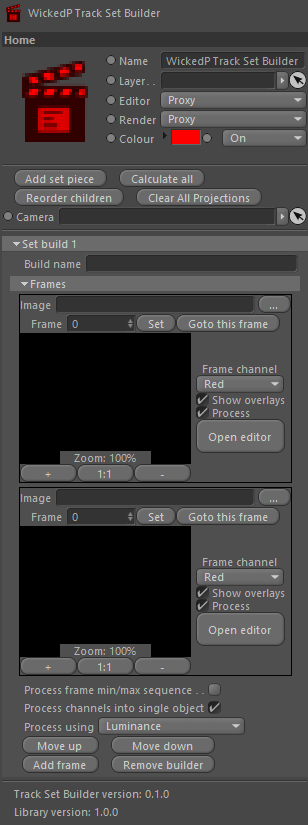
There's a few options shown in the interface. I won't explain them all. But what I'm wanting to get to, is some level of control where I can select a handful of frames from a camera track, and be able to project some data into the images. I'll explain this further below as well.
The main parts in this interface are the frames (the blank/black areas) and the 'Open editor' button for each image. The button opens a custom dialog with more frame options for the user to command.
I'm still working on the dialog, but as of the time of writing this post, it looks like this:
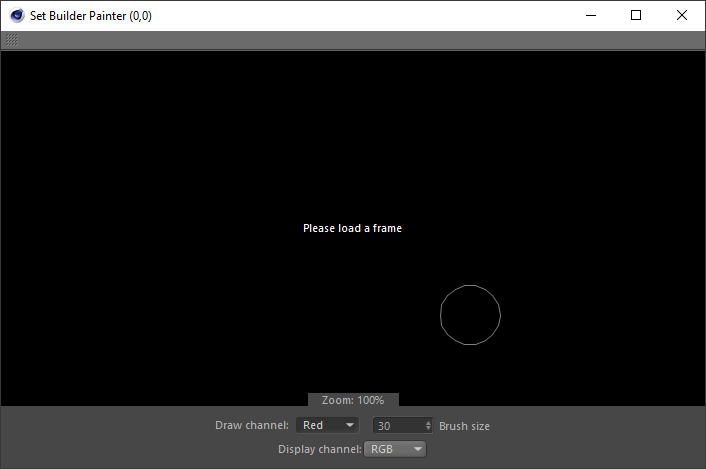
This little popup window is for the user to draw into the frame. What they're drawing is a mask. Very simple, nothing overly complicated. They can draw into any of the four available channels, which under-the-hood are basically image RGBA channels. The painted mask can be displayed in the window, over the original camera tracked frame. There's a paint brush circle to tell the user how big the brush is, some zoom controls, and c couple of other basic options to set. The mouse cursor is a paint brush icon but it's not shown in the image above because when you take a screenshot the mouse disappears momentarily.
The idea of this window, as mentioned, is to draw a mask into one of the available channels. This will give the user four possible masking options to use later on during the engine processing stages.
And now, the awesome part
Having built an interface, even unfinished, I decided to tackle the engine as well. Yep - and this is where the magic really starts to happen. Let me explain.
If you can match parts of one image to parts of another image, and you've already got a good camera track solve, then you can do a kind of triangulation that can put all these found key points into the 3D space! And, if you have enough of them, you can polygonise the points with some sort of algorithm (like the Delanauy one I added to a tool I previously built) and viola - you have a photogrammetry-style tool to build sets from your footage with!
UPDATE: I never posted about the Delanauy tool I mentioned above, it sat in my drafts but I never published it. I have now published it for you to read, you can follow the link here to read up on this tool.
And - I got it partially working! The first step is to paint a mask into the frame. This can be used to tell the engine to not work in the masked areas. The second step is where the engine comes in. The engine can process images by searching for key points in an image. The engine will then process these points for two or more images, and tries to find matches between them, using the mask layers to ignore parts of the image you don't want it to search in. If you've done this for at least two images, then it will try match the key points between the two images. And if the engine can find matches, you're on your way to creating a set building tool, or a quasi triangulation and polygon mesh building tool!
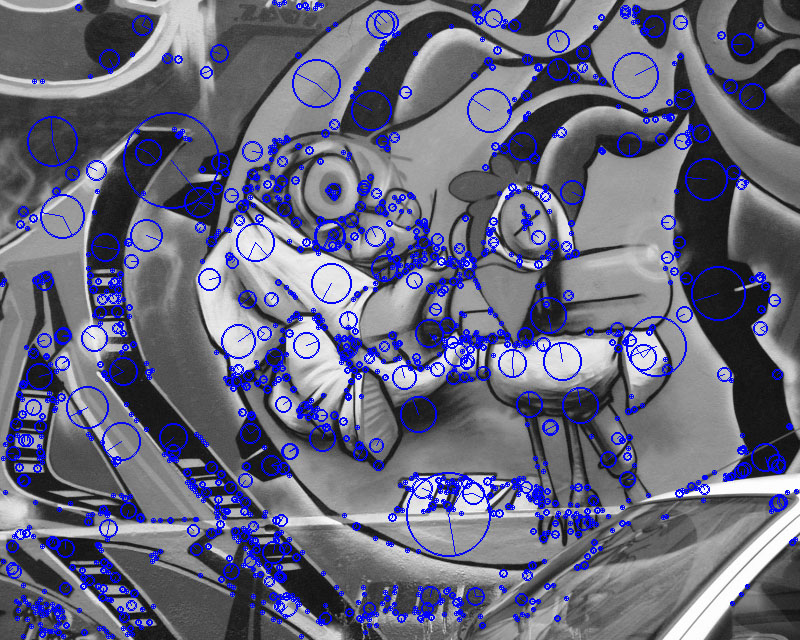
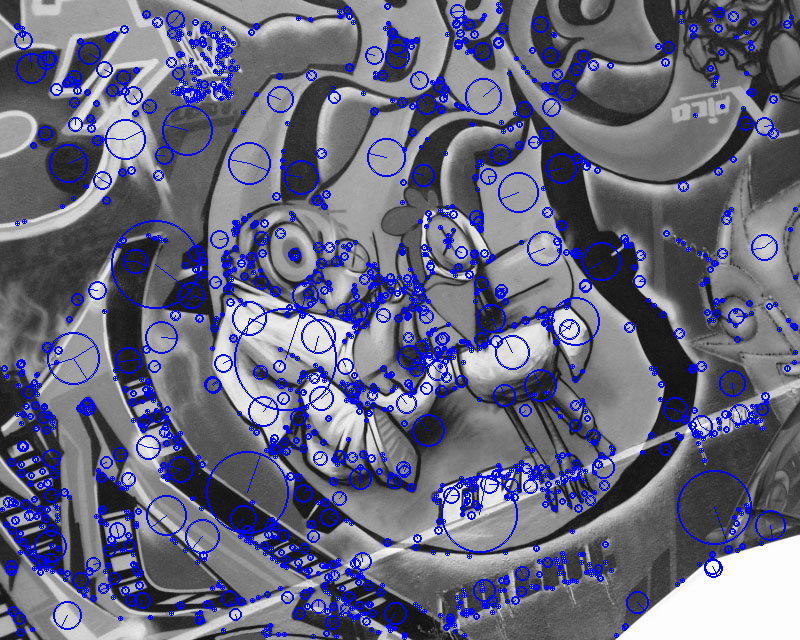
Here's some pics to explain. First, lets pick two frames. The following two images are greyscale versions of the ones from the University of Oxford, which we'll put through the engine. Use the slider below to slide between the two testing frames.
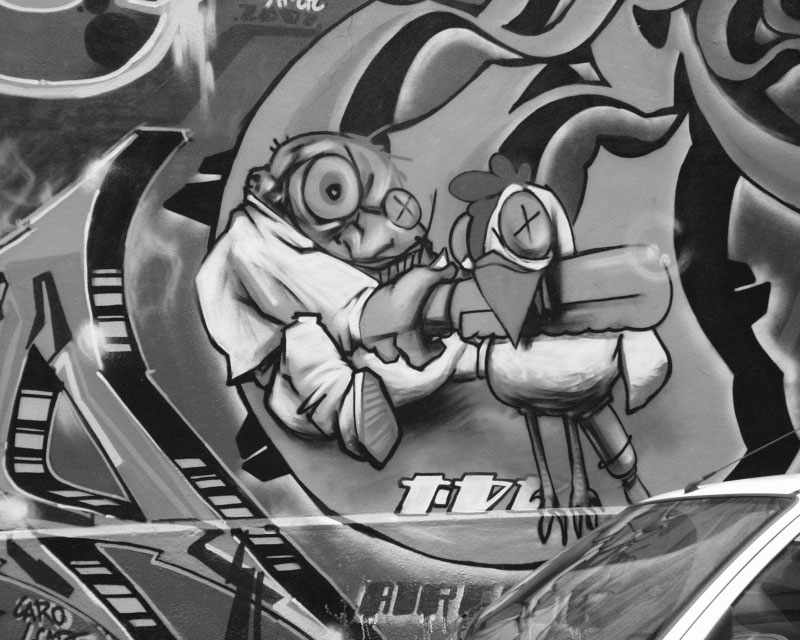
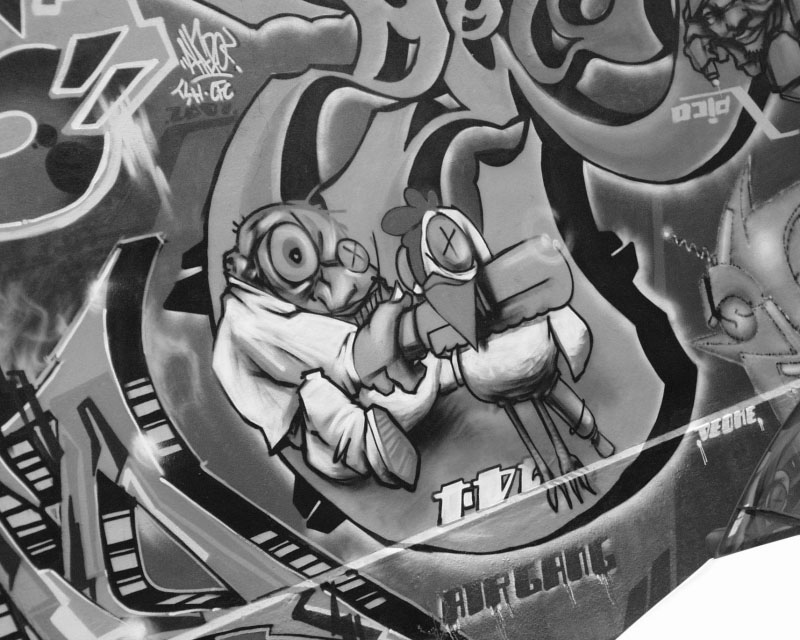
The two images above are going to represent out camera tracked frames. I know they're not strictly from a camera track... but we're just testing the engine itself here. You can see that the two images are different; the camera has taken each photo at a different place.
Now what? Well, lets try find some key points in both images. Again, use the slider to see where the engine has found some key points (blue circles):
Alright, so far, so good. Now what we need to do, is try and match some of the key points found in image one, to the same place in image two. This is a bit more tricky, so what we'll do is draw some lines between the matching pairs:
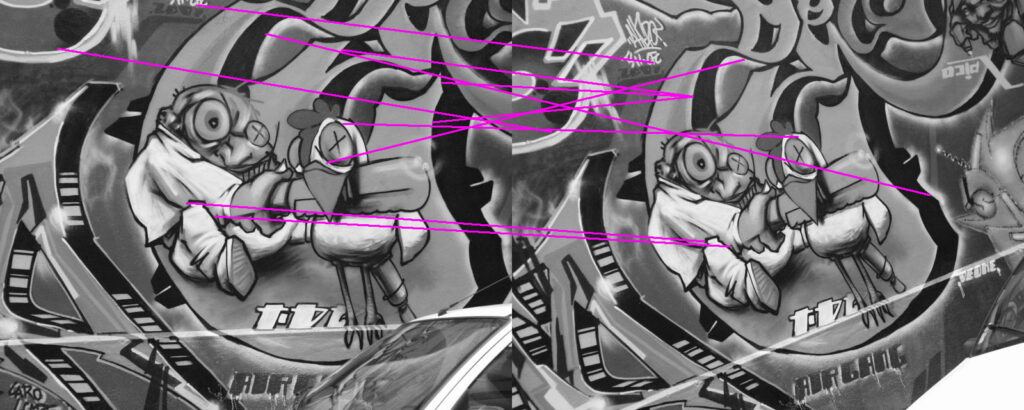
The image above shows purple lines of matched pairs drawn between the two images. I've only drawn lines for the first 10-or-so matched pairs. Those with a good eye will spot a few matched pairs that aren't correct. But, there are a few that are. I'll have to work on filtering out some of the negative results (I have some ideas).
And this is where this tool has come to thus far. The next step is to do some sort of triangulation between the matched pairs in both images, using the camera track as the main camera source. I've already been able to do this part in another tool. So the plan now is to borrow the same code from the previous tool I built to do triangulation, and use that to triangulate the matched key point pairs from each image.
I'll make another post soon showing the tool in action with a complete camera tracked shot.
There's probably a number of other uses for the tool as well, I have a few in mind already. But for now, I got a really cool little tool in the works. And in the right place, this one will be really useful.
Another cool box being ticked.
Update
I updated the image loading code to work with any image file types (well, any image file type I can load), and something odd happened. The algorithm now works almost flawlessly... I don't get it. On JPEG images, which in this instance were just saved out from the original greyscale images, and had more signs of compression, worked better than the original greyscale images. Here's an image result, the blue lines are hard to see, but they're all correct:
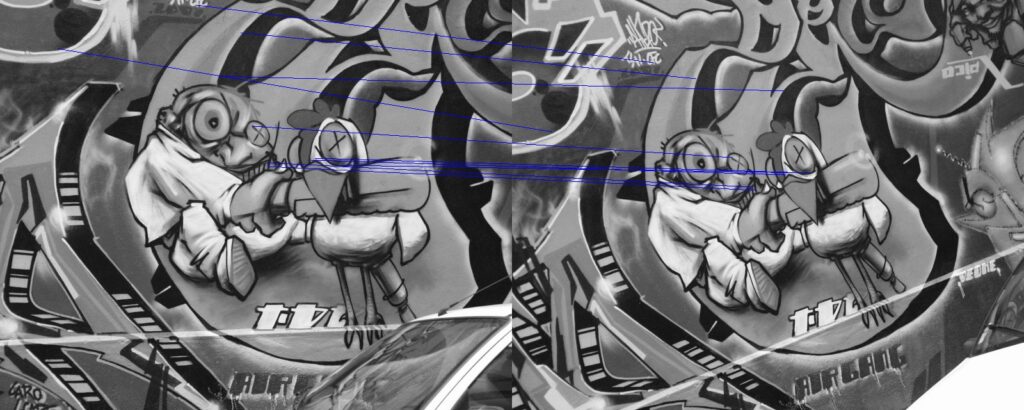
I guess that's a good outcome... not sure what it means though. Maybe the key point finder engine is helped by compression artifacts, because it helps texturise the image more? But compression artifacts wouldn't be the same in each image... so... Then I thought, maybe there's an error reading the original PPM/PGM image files? Possibly. Otherwise, I don't know.