
Following on with the posts on my new set building tool (here and here), I found trying to make this tool work was becoming rather tricky. I've had some issues with access violation crashes, and haven't been able to find a solution to the problem.
Checking to see how I'd done this in other tools, I realised I was casting things incorrectly. Type casting is a coding thing, and it's important when you're dealing with objects that might inherit structure from other objects. Turns out I was casting using the wrong functions, which caused a type conversion issue, which caused the access violation issues. This was a real headache to figure out. But finding this and applying the fix helped me move forward again.
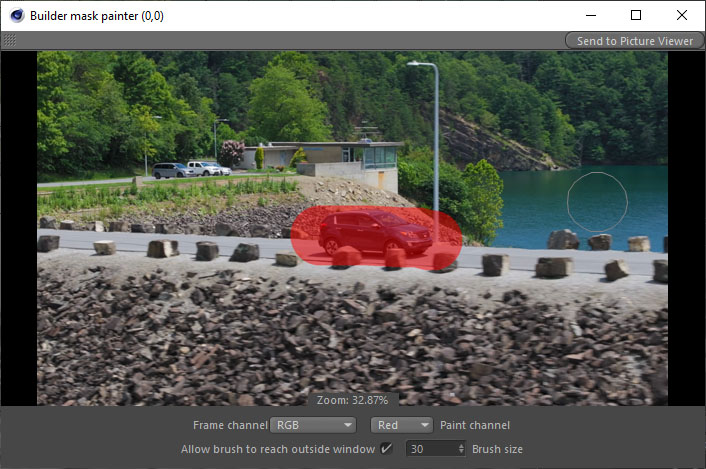
I went on to trying to make the mask painter dialog work again. With a bit of persevering, I managed to get the mask painting system to work also. I can now paint masks on top of individual image frames, which means I can create masks to ignore areas of an image I don't want processing done on. In practice, the painter is a little slow. I'm surprised it lags like it does. It's just an image display with the ability to paint in it. I've even multi-threaded the brush calculation and draw, but it still has a noticeable lag. I'm not really worried about it though, so long as I can create the mask, even if it's a bit rough, and send it to the main engine, that's all that really matters for now. The mask painter interface looks like this:
I've worked on quite a few other areas of the tool as well, really trying to shore up and make things run as efficiently as I can. I multi-threaded some parts of the tool. This alone took processing of an HD resolution image down from 54 seconds to about 12 seconds. I decided to take this a step further, and thought if I can multi-thread the engine in places, I may be able to get the whole process down to single digits. And with a bit on ingenuity, I managed to get the full process down to just 6.6 seconds! Not stopping there, I also made the engine work on any resolution images, that is, they don't have to be the same sizes. This got the test images down to just 3.046 seconds!! And if I'm super picky, I may even be able to improve things a little more.
Think I've done a pretty good job here. I know a competent computer scientist who really understands things better than I do could probably find more efficient ways of processing things, but for a self-taught hobbyist, I think that's a pretty good result!
Let's have a look at some screen shots.
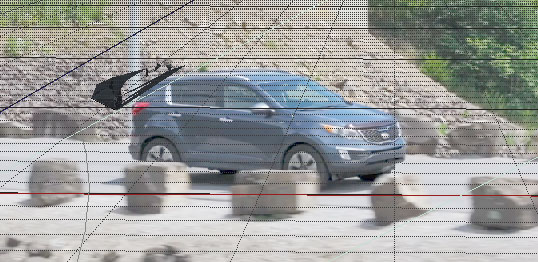
Here's two frames from an ActionVFX shot I've camera tracked in the past, both with masks drawn on them:
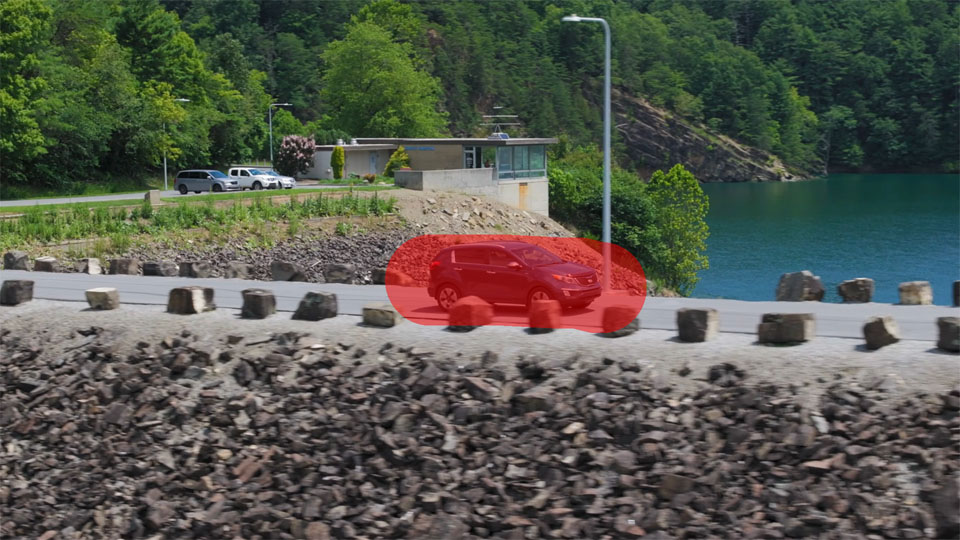
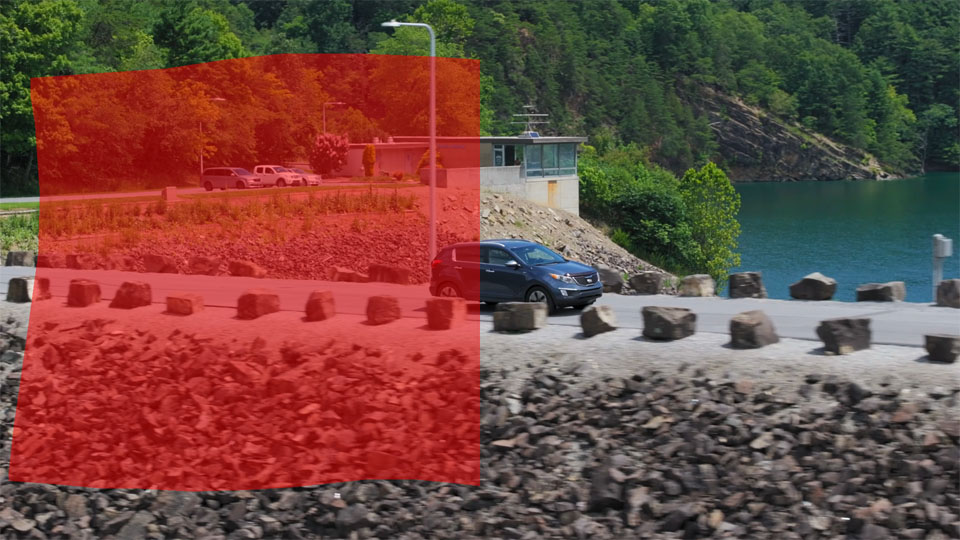
The masks are the red areas, which is where we want out engine to focus on. I masked over the car and it's immediate surroundings, to really push how far the engine will find things in. The results are below.
Here's what our found key points are in out first image:

Now, here's the key points in image two:
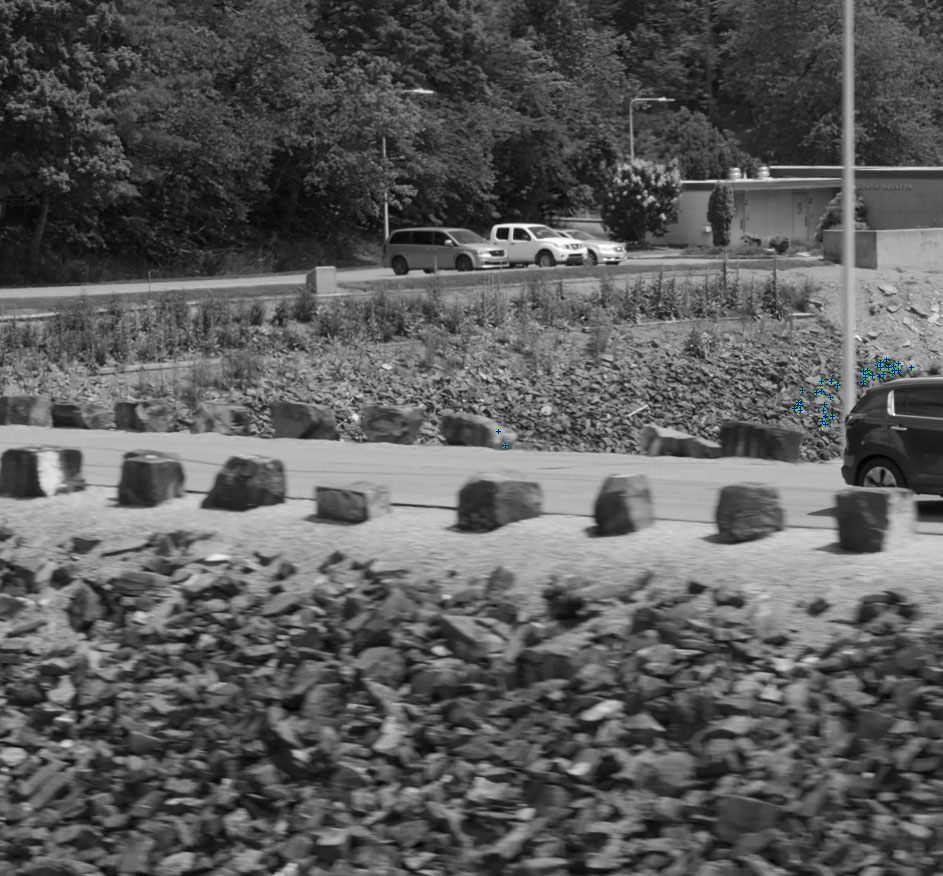
Keep in mind that the images have been down-sized to fit around the mask areas. I deliberately chose these two images because the car was in different places, and the masks produce two different resolution images to test the engine with. Here's what the matched pairs result looks like between the two images:
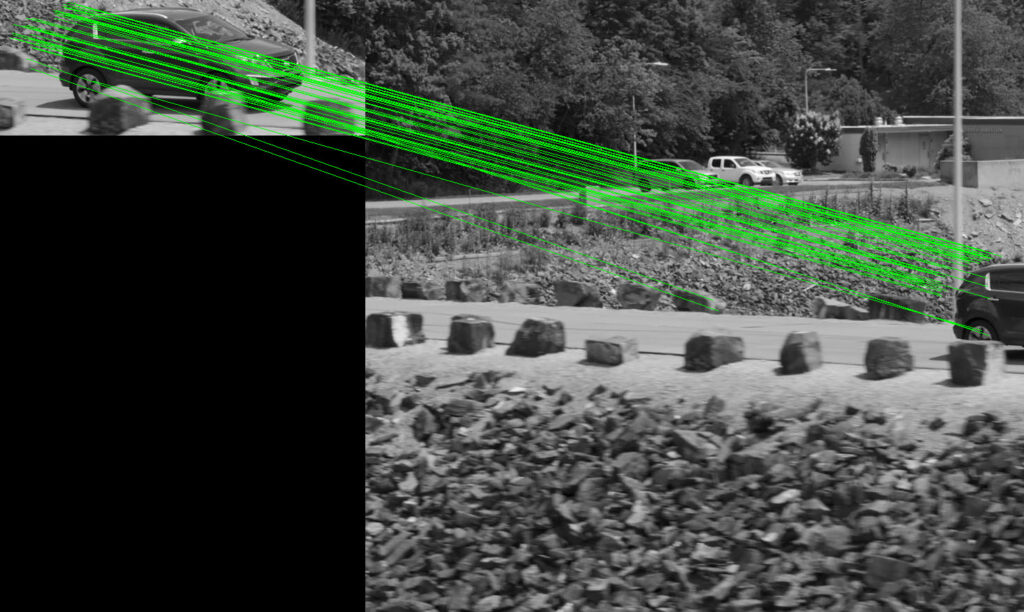
What's really impressive with the picture above, is you'll see two lines being drawn to a rock on the side of the road. These matches are indeed correct, and this really highlights how good the matching is. It's even matched two locations on the car wheel!! In this instance though we can't use the wheel matches because the car is moving. My engine removes these results.
So, this all looks really cool. And let's have a look at our resulting triangulated mesh:
Now, this looks a bit weird. But it is correct. Just to explain the triangulation result above (as it looks a bit poor), it looks like this because this is just a screen capture of the viewport and there's only a handful of marker locations to make a polygon mesh out of. So this result is fine - it's a proof of concept that it works, even if it looks a bit odd, and that's all I was after.
I'll endeavour to make a more complete example sometime, to show the tool working in a more useful way.
All in all, the tool seems to be going down the right path. There's still a few things to iron out, I still have a strange crash that the debug doesn't tell me anything about. But I'm really happy with the way I've constructed the engine for this tool. It's quite effective, and works fairly quickly on the given test images. Which means when the time comes to use it on higher resolution images from my big film camera, the engine should be able to handle them fairly well.
Another really handy tool coming along here. It has a really good use potential.